
一、购买云服务器
选择没有被限制的云服务器即可,系统选择CentOS最高版本64位,线路可选择香港服务器,配置根据使用人数可选双核、内存1G、带宽3M,具体开通方法这里不做详述。
二、SS服务端软件安装
第一条命令:
wget --no-check-certificate https://raw.githubusercontent.com/teddysun/shadowsocks_install/master/shadowsocks.sh
第二条命令:
chmod +x shadowsocks.sh
第三条命令:
./shadowsocks.sh 2>&1 | tee shadowsocks.log
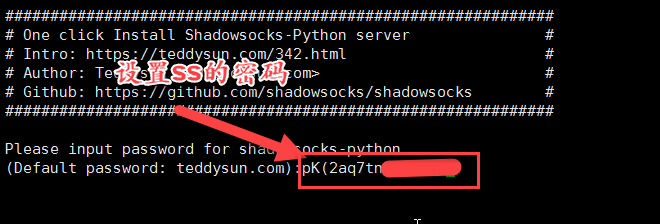
中间会提示你输入你的SS SERVER的账号,和端口。不输入就是默认。跑完命令后会出来你的SS客户端的信息。
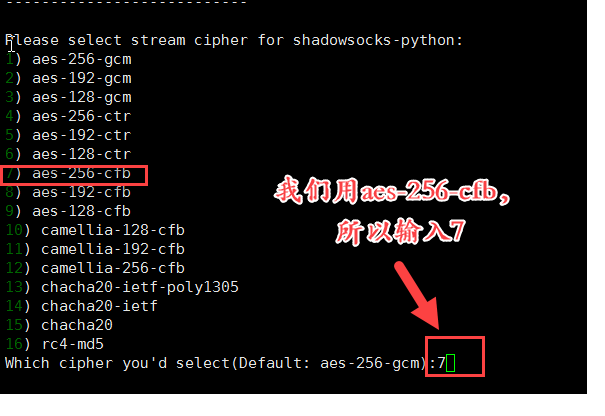
特别注意,由于iphone端的的wingy目前只支持到cfb,所以我们选择aes-256-cfb,即7
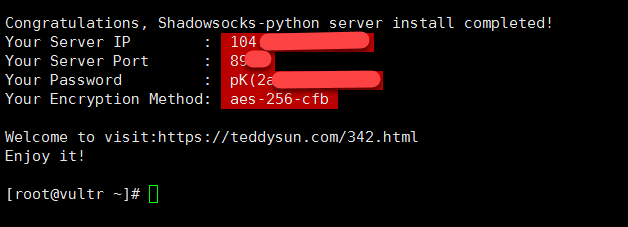
这一步按回车继续,然后命令持续执行约5分钟后结束,直至出现以下信息,即代表SS服务端软件安装成功。
请立即copy下来加以保存。 上面的命令全部回车执行后,如果没有报错,即为执行成功,出现确认提示的时候,输入 y 后,回车即可。
安装完成后,脚本提示如下:
Congratulations, shadowsocks install completed!
Your Server IP:your_server_ip
Your Server Port:your_server_port
Your Password:your_password
Your Local IP:127.0.0.1
Your Local Port:1080
Your Encryption Method:aes-256-cfb
记录保存好你的上述信息:Server IP、Server Port、Password、Encryption Method 这时你的专属ss已经大好了,开始使用吧。
三、卸载方法
./shadowsocks.sh uninstall
四、配置文件 配置文件路径为:/etc/shadowsocks.json 单用户配置:
{
    "server":"your_server_ip",
    "server_port":8989,
    "local_address":"127.0.0.1",
    "local_port":1080,
    "password":"yourpassword",
    "timeout":300,
    "method":"aes-256-cfb",
    "fast_open": false
}
多用户配置:
{
"server":"your_server_ip",
"local_address": "127.0.0.1",
"local_port":1080,
"port_password":{
"8989":"password0",
"9001":"password1",
"9002":"password2",
"9003":"password3",
"9004":"password4"
},
"timeout":300,
"method":"aes-256-cfb",
"fast_open": false
}
五、相关使用命令
/etc/init.d/shadowsocks start|stop|restart|status
七、windows、安卓、iphone、mac设置使用,下载Shadowsocks软件客户端
注意:本文归作者所有,未经作者允许,不得转载